
Recently I taught an art lesson on Dorothea Lange. It turned out to be a timely lesson. The 2016 presidential election is upon us and it is the first time I have felt such extreme negativity during an election. But, I remain positive and have faith that America is a resilient country and no matter who is elected president, the U.S. will be okay. The Dorothea Lange lesson helped remind me of how the U.S. can endure and overcome.
Dorothea Lange was a remarkable woman. We could all learn from her compassion for people. Having suffered hardships herself (she had a bout with polio as a child that weakened her right leg and her father left her and her mother when she was 12), she seemed to want to help others who were disadvantaged. She was a fairly successful portrait photographer in San Francisco when she decided to turn her camera on the people who were suffering because of the Great Depression. It was, in part, due to her photos that the poor and forgotten people of the Great Depression received government aid to prevent starvation.
I have been involved in a local elementary art program for the past eight years, and I have to say this was one of the most rewarding lessons I have taught. The kids I teach range from kindergarten to 5th grade, and they all seemed to get something out of the lesson. For an art project, the kids were to create a collage on a piece of paper with the Dorothea Lange photo, Migrant Mother, printed on it. They were allowed to add anything they wanted using crayon, magazine cut-outs and colored paper scrapes. It was very touching to see the kindness the kids showed in their art work towards the migrant woman and her children.
 |
| A few examples of the art project. |
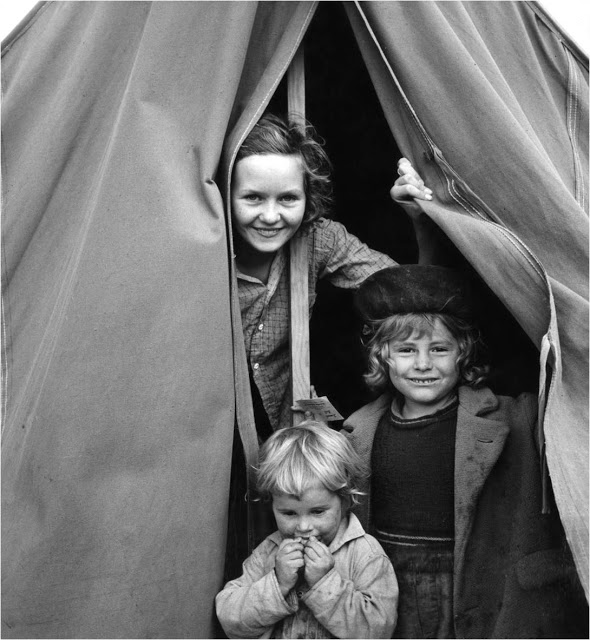
My mother was a child of the Great Depression. She told stories of how they would camp all summer during the depression. They did so because that is where my grandfathers work took them. My grandfather was a bridge builder and had to travel to the sites. The whole family would accompany him during the summer. My grandmother earned money by cooking for the whole camp. My mother's situation may have been more fortunate than others (my grandfather had a steady job), but I believe that kids' have inherent optimism and some, like my mother, thought their situation was an adventure.
While doing the research for the Dorothea Lange lesson, I came across a recipe for Depression Era Bread and decided to try and make it. I did not expect to get such a gorgeous loaf of bread. Granted, I probably have better cooking conditions than they did during the depression, but who knows? From the stories my mother told, my grandmother was quite a cook, she may have very well made bread like this. I do know that whenever we visited my grandmother, she always put out a stack of bread on the table for every meal. By this time, though, she bought bread. I think after cooking for 30+ men and her 6 kids, when she was finally able to afford certain luxuries she took advantage of it.
Depression Era Bread
I am not sure of the source of the recipe, but all the Depression Era Bread recipes I came across are essentially the same. Thinking that much of the bread during the depression was cooked in a Dutch oven over a campfire or wood burning stove, I used my Le Creuset Dutch oven (cast iron would have been more accurate, but I do not have one) to bake the bread. I followed directions from Le Creuset for baking bread in a Dutch oven.
4 1/2 cups all purpose flour
1 1/2 teaspoons salt
1 1/2 tablespoons yeast
1 1/2 cups warm water
Approximately 2 tablespoon of oil, divided-I used olive oil
In a large mixing bowl, stir together the flour and salt. Form a well in the center of the flour/salt mixture. Pour the yeast into the well, then pour the warm water over the yeast. Mix with your fingers until the yeast dissolves. Continue mixing the yeast with the water and start mixing/kneading in the flour until there is no more loose flour. If the dough is dry, you can add a more water a little at a time, until you have a nice ball of dough that is not too sticky. Continue to knead the dough for a few minute until smooth and bounces back a bit when you press on it with your finger. Form the dough into a ball, remove from the bowl, and set aside. Wash and dry the bowl, then put in about 1 tablespoon of oil. Place the dough back into the bowl and turn it over once so that there is oil on the top side of the dough ball. Cover the top of the bowl with a dish cloth and place in a warm area to rise. Let it rise 2 to 4 hours, until the dough is double in bulk and does not bounce back when you push your finger into it. Once the dough has risen, punch down and knead to release the air and redistribute the yeast. Let the dough rest for about 10 minutes, then shape the dough into a tight ball-tighter the better. Place dough into the center of a well oiled Dutch oven; cover with lid and let the dough rise again for 30 to 60 minutes (less if it is warm and humid, more if cold). While the dough is rising, pre-heat the oven to 450°F. Gently rub the surface of dough with the remaining tablespoon oil and score with a sharp knife or razor, either in an x-mark or wide hash mark (this allow the dough to expand more). Cover the Dutch oven with lid. Bake for 30 minutes at 450°F, then remove lid, reduce heat to 375°F and bake until bread is nicely browned and the internal temperature reaches 200°F or more*. Let bread rest 30 minutes before slicing.
*Note: I realize that my grandmother and others during the depression did not check the internal temperature, but it is reassuring to do. When the loaf of bread I baked was nice and golden brown, the internal temperature just confirmed it was done.
Enjoy, and being that it is voting day, may we all be gracious whether our candidate wins or loses.

No comments:
Post a Comment